First - Dan and I started taking Chantix on Jan 5 - and our Quit Date was Jan 12 -
and we haven't smoked since! I've gained more weight than i want to own up to - my doctor is all "you lost is once you can do it again" and encouraging the quit over fretting the weight. She did us both a solid, however, when she prescribed Nexium We've slept better and been more comfortable the past few days that we have in the past 2 months! the acid stomach and horrible gas from the Chantix were complicating the stress - and now that has resolved. I highly recommend anyone on Chantix pick up Nexium and start taking them immediately - and plan to continue as long as you're taking Chantix.
My Father-In-Law passed at the beginning of February - We has his Internment Ceremony Saturday, followed by a 'reception' over at Evalyne's place. She is proving a challenge. Dan is there daily - every single day since the beginning of February. We've had to take over her bills and checkbook - othewise she wouldn't have water or electricity - or insurance. Dan stepped in and consolidated the paperwork he found stacked all over 3 rooms and put it all in totes and brought it to our place. We spent 2 weeks sifting and sorting and reviewing and ripping - lots of ripping. But we found out who all she pays, if not how much, and we found the life insurance policies, and homeowners insurance, and health insurance, and have done everything we can to get her essential records straightened out. We got the Life Insurance claims filed, her bills caught up, and I've got access to her banking records electronically so i can pay her bills - on time. She handed it all over to us...she wants nothing to do with paying bills any more. Then we have to figure out how much trouble she's in financially - cuz we're thinking her outgo will exceed her income....and we gotta figure out how to manage that!
In between we went on a cruise - and decided we will NEVER cruise on MSC again. It was horrible! I won't belabor it here - suffice to say they have no idea of customer service - and we have no idea how they're going to survive on the American Market that way!!! We've got our 30th Anniversary Cruise scheduled already - went back to Royal Caribbean - we know them and enjoy them. Maybe next after that will be Celebrity - since they're rating really well these days.
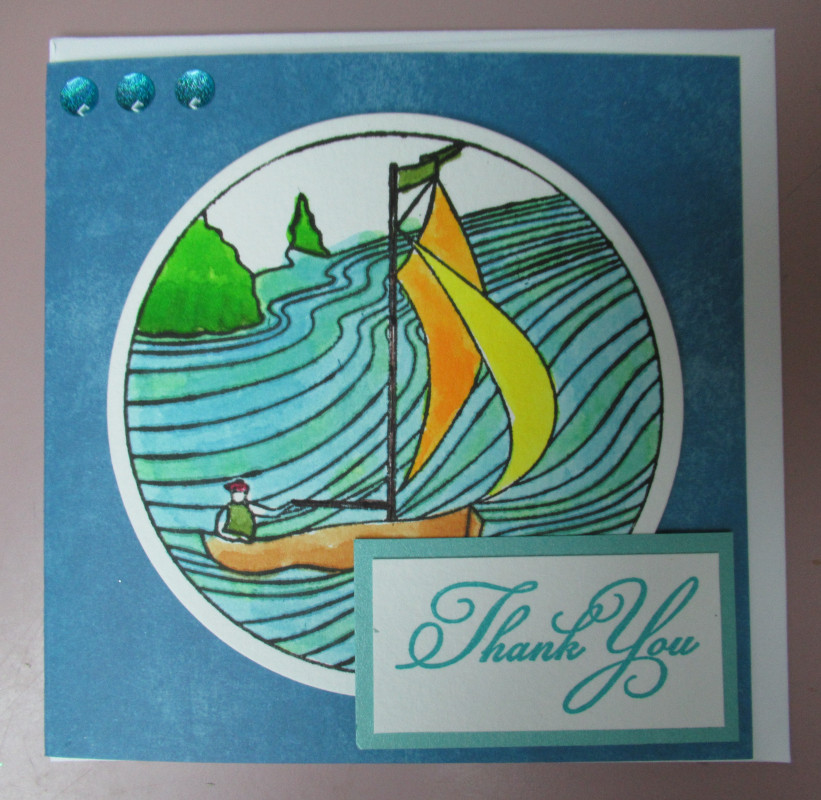
And still I've managed to find time at my beloved craft table. I'm finding I really am enjoying creating Watercolor cards 'the Art Impressions way' ...and am exploring more and more the benefits of embossing with glittery embossing powder. Below are pictures of some of my more recent creations in support of the 2 Swaps i still participate in. Both are hosted at SplitCoast Stampers - one for RonaldMcDonald House and the other Cards for a Cause, which changes the charity supported every month. These pictures are all posted in my gallery at SplitCoast Stampers:
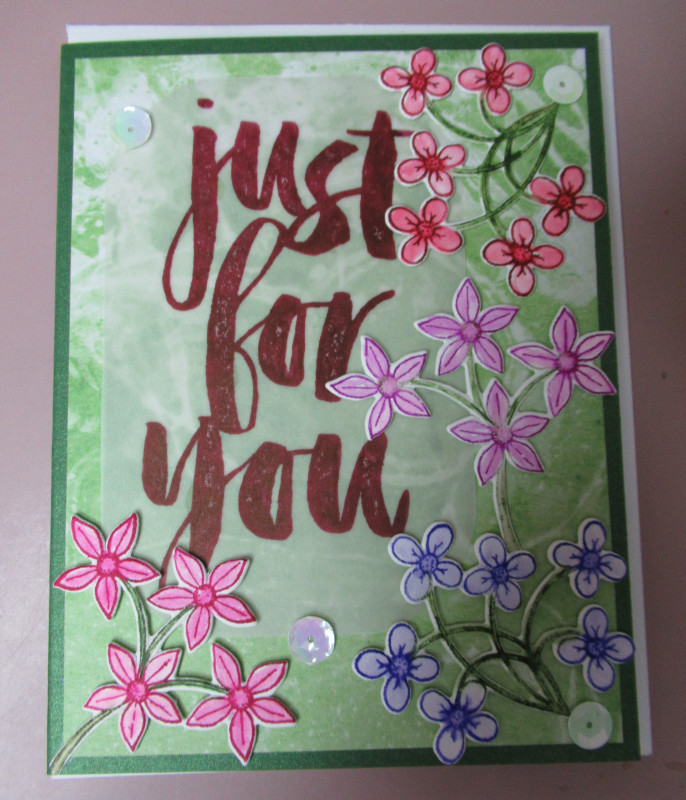
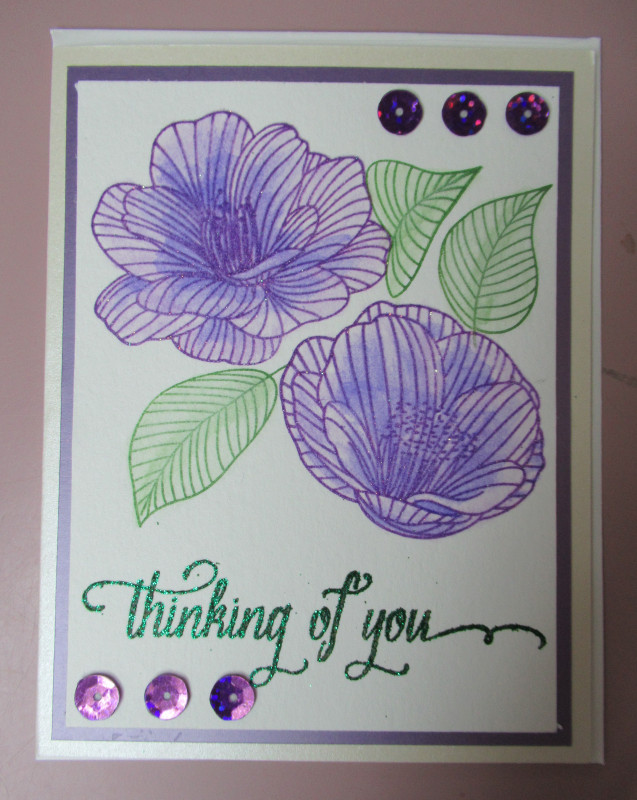
Flowers from Heartfelt Creations, sentiment from StampinUp
|
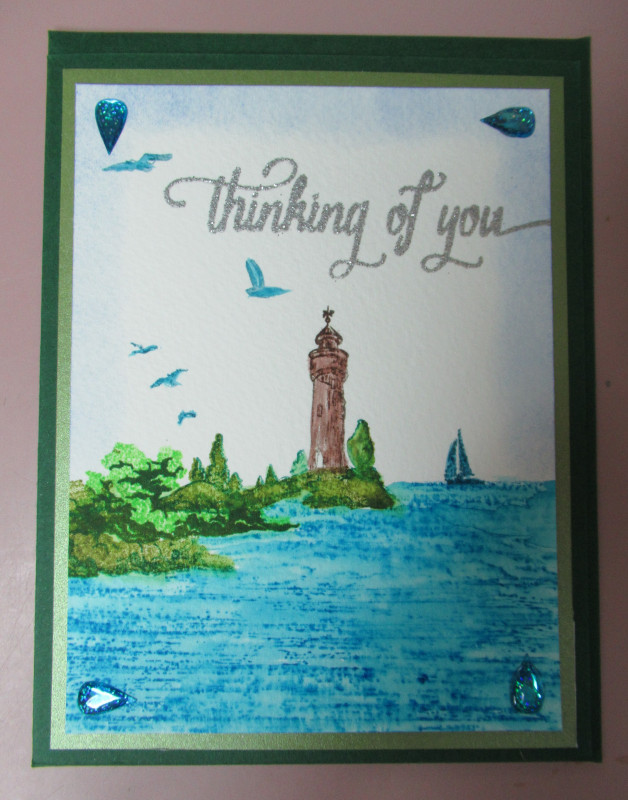
Multi-layered Stamp set from EBay wholesale provider, sentiment embossed in silver
|
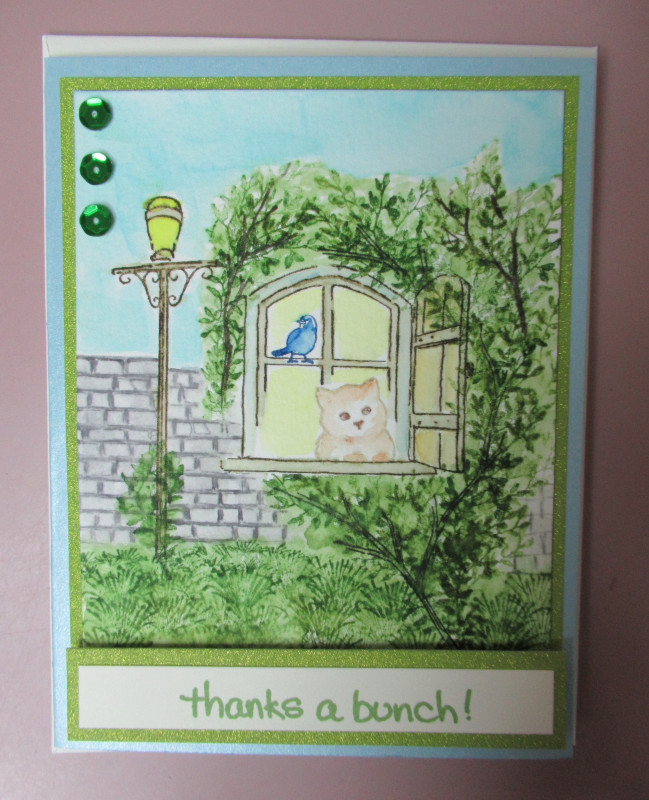
Hand colored, stamp set from EBay wholesale provider
|
 |
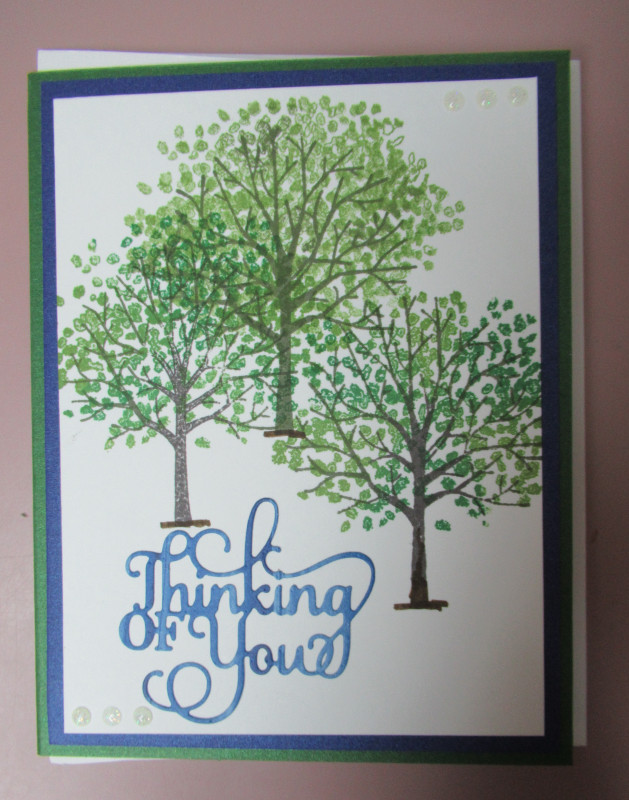
Stamp set from EBay wholesale provider
|
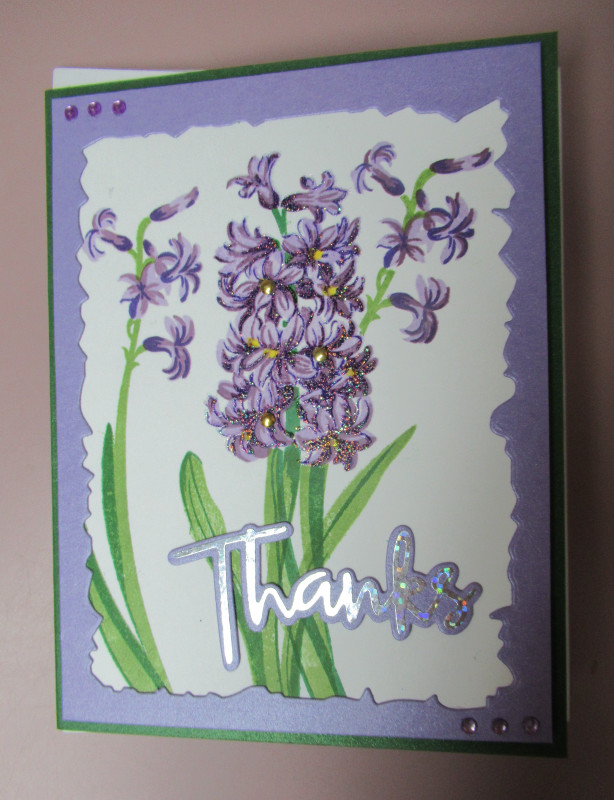
Altenew Hyacinth Build-A-Flower set, with embossed highlights
|
 |
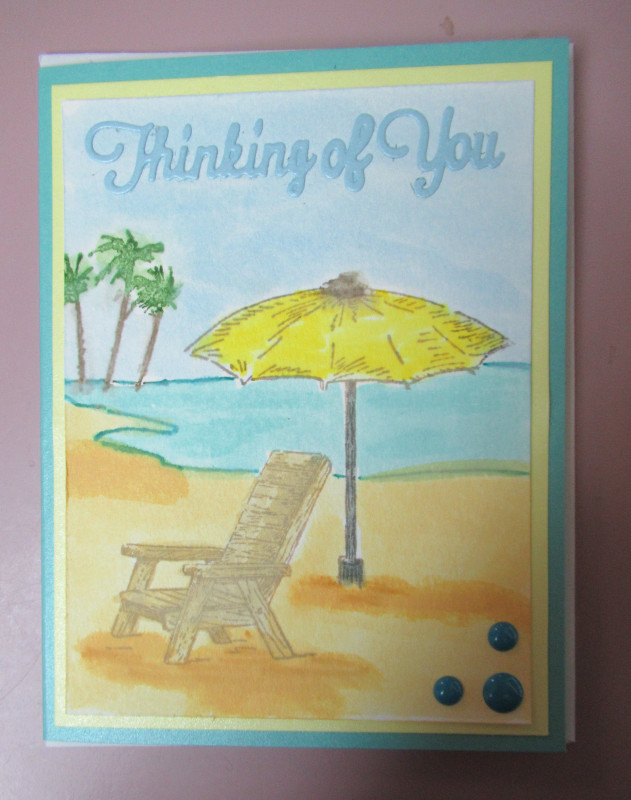
So I seem to gravitate to the Beach scene - i live in Florida - Go Figure!
|
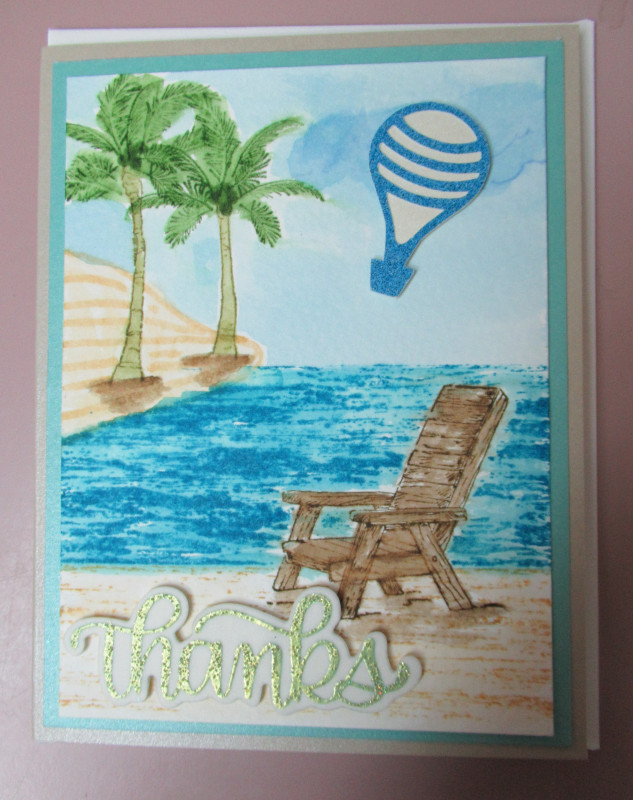
The palm trees are from a 2019 Art Impressions Release!
|
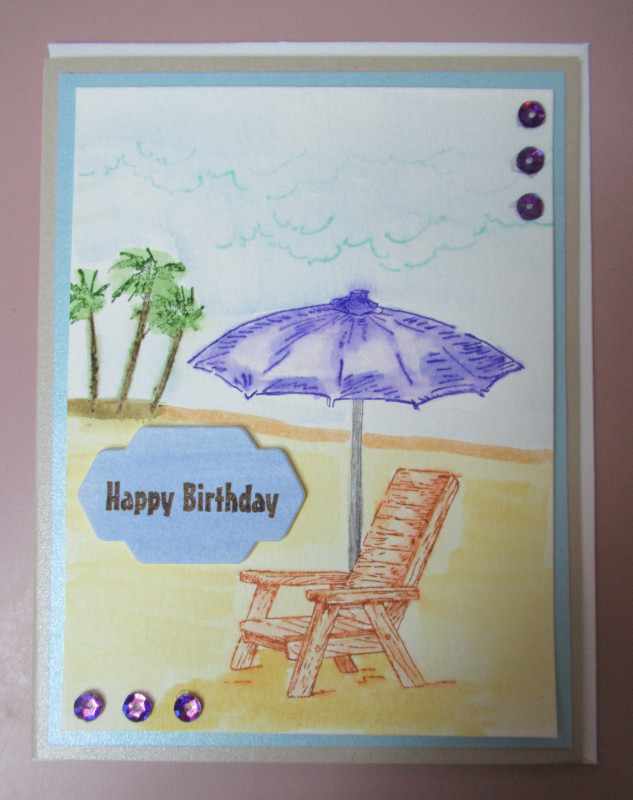
Palm trees here are 'vintage' Art Impressions, manufacturer of chair and umbrella unknown.
|
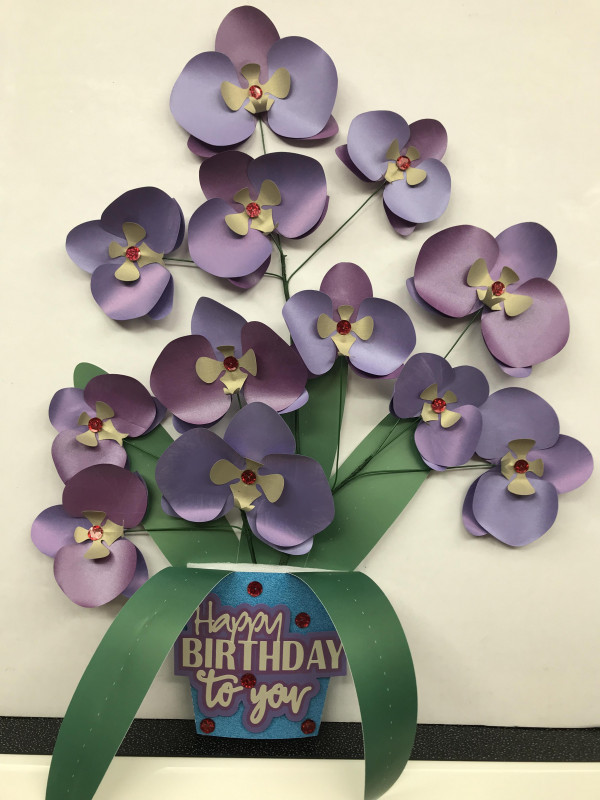
Additionally, I am still creating 'fun' stuff - mostly for mom right now. This is a piece i made for my mom. Mamma's in late stages Alzheimers in a Memory Care facility, and it's very difficult to buy anything for her. Mamma kept Orchids for decades, moved with them from Maryland to Florida, through 3 retirement/assisted living facilities, and they finally died when her Alzheimers got so bad she forgot to, or overwatered them.
So for her 88th Birthday this year i gave her some orchids she couldn't kill - it's about 2Ft high by 18in wide. All in metallic papers, which shimmer and look great, accented by Red jewels. It started out on the wall above her bed - then moved to the bathroom door - and is now missing. I'm planning my next creation for next month's visit.
She loved it, and was gazing and it and smiling at it through most of our visit...The Orchids are from a LiaGriffith pattern, and the Happy Birthday sentiment is my own creation...modeled after something i saw on Google.